commission
This is my first "official" commission for an artwork (other than family). I set myself the deadline for tomorrow. I actually also have tomorrow to work on it, but I want to make a really nice giftbox, for which I'll need tomorrow. Somehow I'm not sleepy. I've been listening to Flick's suggestion for Joni Mitchell and the collage is inspired by Joe. I have absolutely no idea what he's talking about, the HDR and shift tilt lens, but I'm determined to find out, since it's the second time within two weeks I've heard somebody talk about HDR and the shift tilt lens just looks cool (I vaguely get the idea of what it can do, I just don't understand how and I'd like to know). So but it's much too late for me, so off to bed
p.s. I don't really have 4 feet, but because of the angle + lens you get a lot of distortion. Certainly not a shift tilt lens I used. That much I know already :D
---------------------------------
additional tutorial patchwork
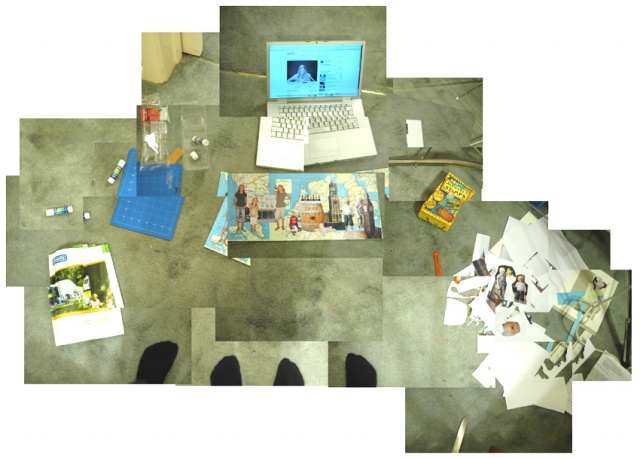
All I can say is there are many ways that lead to Rome. This is the way I take
Take something you want to have a patchwork photo of. Start at something which stands out roughly in the middle. Take a picture. Remember roughly what you see in the borders. Take pictures towards the top and then bottom. move a bit to the right, take a vertical row of overlapping pictures, continue till you've reached the border of what you want to photograph. Go back to your "middle" picture and do the same towards the left.
When you've got all pictures on your computer, open roughly the first ten pictures in Photoshop*. Since I hardly print bigger than A4 size, I always resize all pictures to 8cm wide/300dpi.
Take your middle pictures, copy all and paste (so basicly you have two layers of the same thing)
Go to Image/canvas size and enlarge your working area. This depends on how many pictures you've taken. You can start with 30cm wide/20cm high. Don't worry about this, you can always enlarge/crop later.
Click on the next picture (remember you opened 10 pictures), select all, copy, close, paste into your first picture. Make sure you put it under the first layer, which is your focus point.
Continue with the remaining pictures. Open if available the next 10 pictures and continue till you have no more pictures to place.
With each placement, remember you can change the layer order by moving certain layers up or down. See if it helps to crop a part of a certain layer.
Remember you're not going for a smooth overlap. This technique is to get that patchworky feeling on purpose
I know this tutorial was short, but hopefully you'll just experiment. That's the best way to learn
*I've got the full version of PS, I'm not quite sure whether you can do exactly the same in elements. I think you can, but the difference is that if I save everything, all layers will remain layers, whereas in elements, everthing is collapsed to one layer. This isn't bad, just hope for no power outage and don't save till you are 100% satisfied, 95% is pretty good too
512
views
- 0
- 0
- Nikon D70
- 1/33
- f/1.8
- 50mm
Comments
Sign in or get an account to comment.


