
Creating a Blipfoto Thumbnail Photo Book
A number of you have asked how I created my Photo Book of Thumbnails to record a year of Bliping. So here you go. I use an Apple IPad and IPhoto but I’m sure it’s a similar process for Android etc.
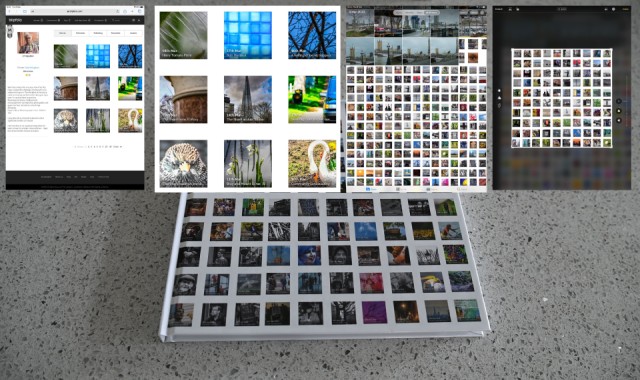
This image shows the four steps. It really doesn’t not take very long.
1. Go to your main page, which displays your pen picture and your last nine Blips. Make and image of the screen.
2. Edit the image of the screen you have just made by cropping around the Thumbnails. Crop the image and save to your photos. Now repeat this for every page of your Blipfoto thumbnails. Try and be consistent to crop each page the same way.
3. When you have completed the individual pages go in to your Photo Library and look at the images you have saved. Get as many of the pages as you can displayed and then take another image of the screen.
4. Now crop the image with the number of Thumbnails you want for a cover. 10 or 11 works well for a Square Book 21cm x 21cm. Do this twice for your front and back covers.
You can use other info for your book. I choose my pen picture plus notes and the Stats Page.
I used a company called Bonusprint to create and print the book. Their software to create a book is very easy.
Some tips
Looking round for discounts - they can be between 40 to 60%.
Load your photos from your Photo software on to your computer and then into the Book. You get better resolution doing it this way.
Comments
Sign in or get an account to comment.


