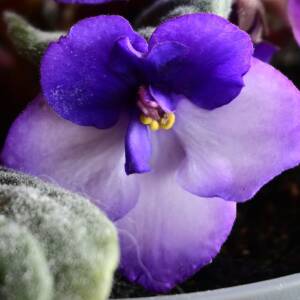
Christmas Azalea - Seeing Red!
Thank you everyone for the great help, comments, stars and hearts for yesterday’s Christmas Azalea. And a very special thank you to paulabanks for her wonderful assistance in terms of using layers to sharpen an image in Photoshop.
In order to cement yesterday’s lessons, and today’s as well, into my hard headed, recalcitrant brain, I decided to do another experiment today. For the other “new” blippers out there, I hope this helps. For those who are very experienced, I hope that my recitations do not bore you too much. In either case, I appreciate your patience with me once again.
Today, I decided to concentrate on the red flowers of the azalea, doing close-ups. They say red is a very difficult color to photograph. I would have to agree. I am not entirely happy with this shot, but I feel that I am making progress.
Let me recount for you the evolution of this photograph. Briefly, I have a Nikon D7100 with a Nikkor 18-200mm zoom lens. This is my only lens at present. Since I am a relatively new photographer, I have decided to learn the equipment I have first. That way, when I do purchase additional equipment, I will have a reasonable degree of experience to have a better idea of what I am purchasing. Also, I shoot all of my photographs in RAW plus JPEG on the second SD chip.
For this shot, I decided to use natural light rather than artificial light. I moved the plant into my sunroom (temporarily) that gets light from three directions. Thankfully when I did this, it was early in the morning and the light was soft and more indirect from the east and south. In order to practice the basics daily, I only shoot manual or sometimes aperature priority. I set my White Balance to “cloudy” in order to get a warmer shot. Because I was basically shooting inside, and the light was still somewhat low, I set my ISO to 800. I wanted a close-up so I sent my focal length to 200mm, and because I wanted at shallow depth of field, so I set my f-stop to the most open position which was 5.6 for this lens. The correct exposure for the shot meant a shutter speed of 1/40 sec. I then took many shots at various angles.
I loaded all the images from the camera onto my drive. I then used Adobe Digital Negative Converter (free from adobe.com) to convert my RAW images into .DNG files. From there, I opened them in Photoshop. I then reviewed each image and selected this one for additional modifications. In Camera Raw I could have made a number of modifications, but I chose not to, and copied the image directly into a .jpeg file. I then loaded the .jpeg file into Photoshop. In keeping with yesterday’s lessons and a few other little things I learned today, I decided to start with an adjustment layer (Layer>New Adjustment Layer) to just add a touch more contrast. I then duplicated the background layer to sharpen the image, as paulabanks suggested in yesterday’s blip (Yes, Paula, you started a monster!). I then added a fill layer of a soft coral to brighten the highlights in the tips of the petals. After flattening the image, I then saved the .jpeg, then uploaded it to blipfoto as you see here.
I would deeply appreciate your feedback on this. Please feel free to comment and give constructive criticism. And thank you for taking the time to read this very long-winded description! You are the best!
- 12
- 0
- Nikon D7100
- 1/50
- f/5.6
- 200mm
- 800

Comments
Sign in or get an account to comment.


